
Connecting directly to the Analyzer using Ethernet requires configuring the Static IP settings. Follow these steps to configure DitNLA manually:
- Connect the Ethernet cable between the network port on the Host Computer (the one with NETS installed) and the Analyzer.
- Power on the Analyzer.
- Boot up the Host Computer.
- Windows 10 and 11 - Right-click the Start button and navigate to Settings > Network &
Internet. - Windows 10
a. Right-click on the Network connection to the Analyzer and select Properties.
b. Select "Internet Protocol Version 4 (TCP/IPv4)" and click the Properties button.
c. Change to “Use the following IP address” and enter an IP address in the 192.168.0.xxx range. Enter a Subnet mask of 255.255.255.0. Leave the Default gateway blank.
d. Click the OK button.
e. Close out of all windows and give the PC 30-60 seconds to reset the IP address. - Windows 11
a. Click the dropdown button on the Network connection to the analyzer.
b. Click the Edit button next to "More adapter options".
c. Select"Internet Protocol Version 4 (TCP/IPv4)" and click the Properties button.
d. Change to “Use the following IP address” and enter an IP address in the 192.168.0.xxx range. Enter a Subnet mask of 255.255.255.0. Leave the Default gateway blank.
e. Click the OK button.
f. Close out of all windows and give the PC 30-60 seconds to reset the IP address. - Select the DitNLA utility from the Windows System Tray and right-click to open the application.
- Verify the Analyzer Information appears under the Host PC section.
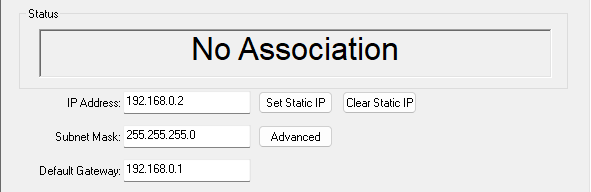
a. Click the Associate/UnAssociate button so the status is No Association.
b. If the Set Static IP field has a value, click the Clear Static IP button.
c. Click the Set Static IP button and enter an IP Address. The address must be in the same address range as your local PC (i.e., if the analyzer is static at 192.168.0.2, the PC must be in the 192.168.0.xxx range). To change the default Subnet Mask and Gateway values, click the Advanced button and enter the required information. - Click the Associate button to initiate the connection to the Analyzer.
- Verify that the Connected With Associate message is displayed.
- Launch NETS to finish configuring the system.
Source: NETS User Manual, Revision D, document 132-06035-0006, section 1.4.4.2.