
Sometimes, Windows or a third-party firewall may prevent NETS from communicating with the analyzer even though DitNLA has been properly configured. Follow the steps below to allow DitNLA access through the Windows firewall.
Note: These instructions require administrator access to the Host PC. If group firewall policies are in place, only the customer IT department can make DitNLA access changes. A message similar to the one above will be displayed.
- Right-click on the Start button and select Settings.
- Navigate to:
Windows 10 - Update & Security > Windows Security > Firewall & network protection and click on "Advanced settings".
Windows 11 - Privacy & security > Windows Security > Firewall & network
protection and click "Advanced settings". - Click on "Inbound Rules" and ensure the DitNLA Application listings are marked as "Allowed" under the Action column.

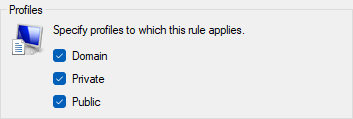
- If not, double-click on DitNLA Application and click on the Advanced tab. Ensure all three profiles (Domain, Private, and Public) are checked.
- On the General tab, select the radio button labeled "Allow the connection" under the Action
options.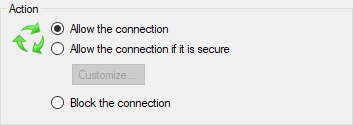
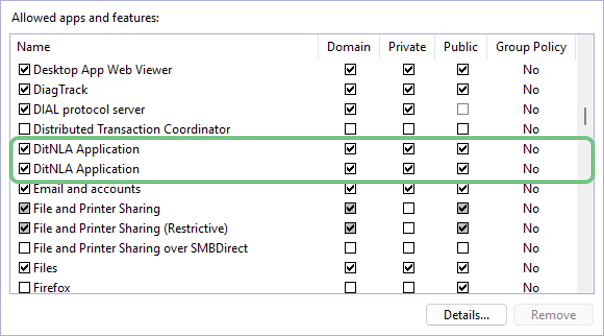
- Click on "Allow an app through firewall".
- Find DitNLA in the list and ensure both the Private and Public checkboxes are marked. If not, click the "Change settings" button and mark all boxes. Windows 10 will have Private and Public options available, and Windows 11 will have a third option for Domain.
- Click OK if changes were made, or click Cancel if no changes were made.
Source: NETS User Manual, Revision D, document 132-06035-0006, section 11.1.3.