
Before You Begin
- Disconnect all products and test adapters.
- Ensure the tester is powered on and operating normally.
- Verify no active production tests are running.
⚠️ Warning: Running a Self Test with a product or adapter connected can cause false failures or damage to the product.
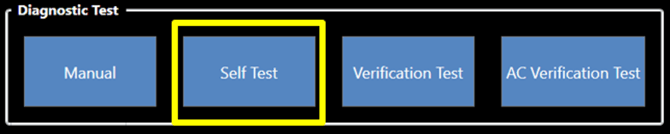
Step 1 – Open the Self-Test
Open the Self-Test from the NETS Maintenance menu.
The Self-Test is used to verify proper operation of the switching system before testing production assemblies.
Step 2 – Configure Self-Test Parameters
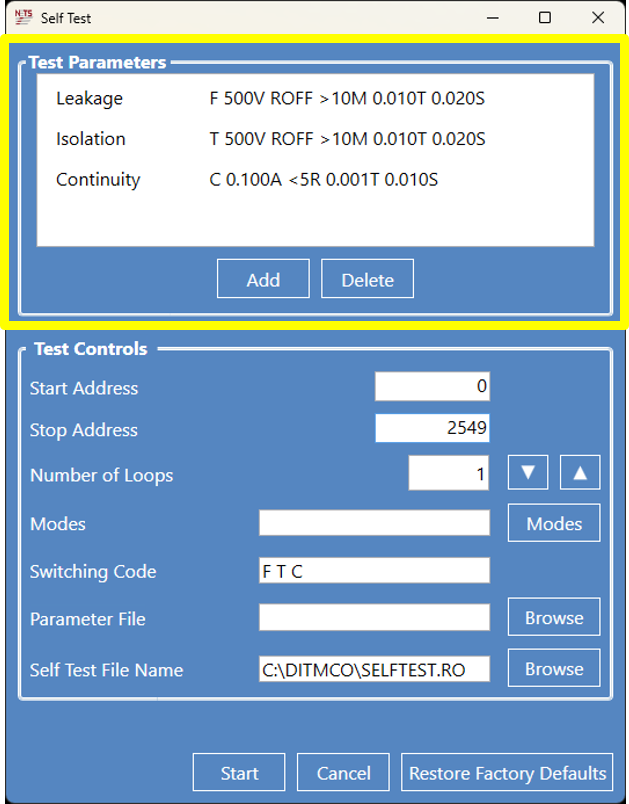
Test Parameters define the limits used during the Self-Test.
For the most accurate diagnostics:
- Match the Self-Test voltage settings to your production test files.
- For example, if your production script uses 500 V insulation testing, configure the Self-Test to use 500 V as well.
- Add or remove parameter sets as needed.
💡 Tip: Matching Self-Test parameters to your production test scripts helps ensure the system is performing as expected.
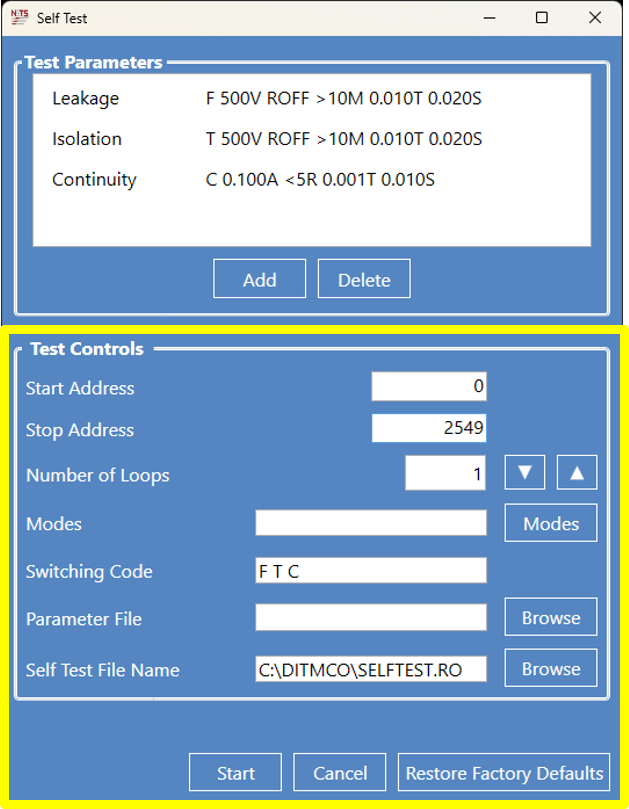
Step 3 – Configure Test Controls
Configure the following settings before starting the test.
| Setting | Description |
|---|---|
| Start Address | First address to test |
| Stop Address | Last address to test |
| Number of Loops | Number of times to repeat the test |
| Modes | Optional testing modes |
To test the entire switching system:
- Start Address: 0
- Stop Address: Highest system address
To test a single switching card, specify only the addresses assigned to that card.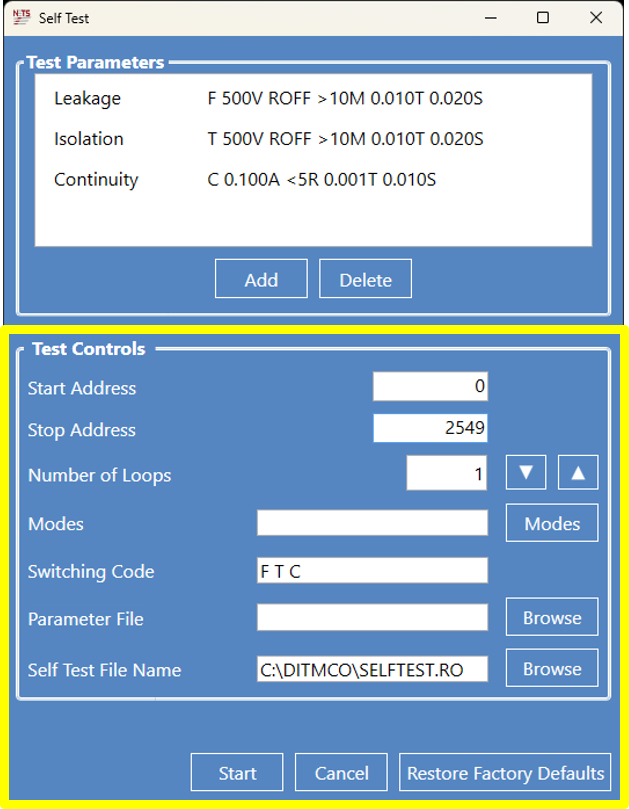
Step 4 – Select a Switching Code
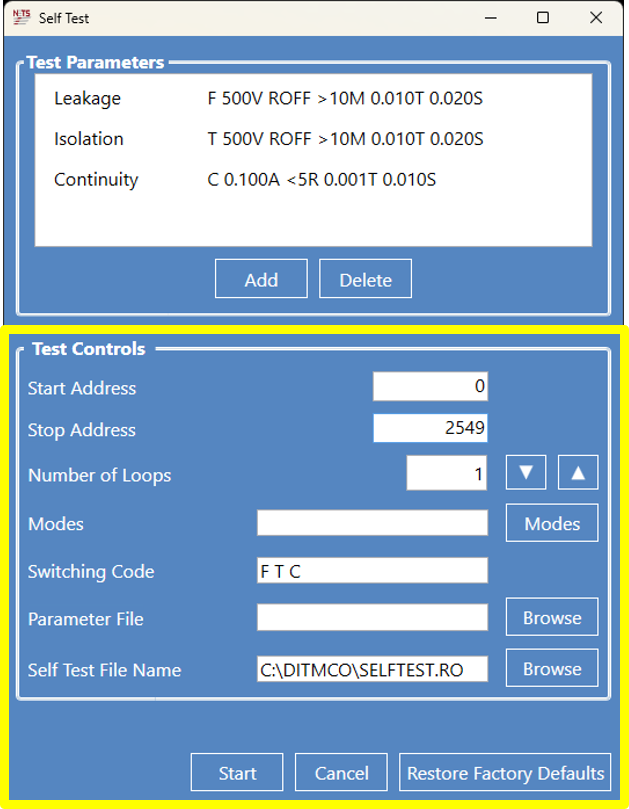
Choose the Switching Code that best matches the diagnostics you want to perform.
| Switching Code | Description |
|---|---|
| FTC | Complete continuity, insulation, and leakage test |
| FC | Continuity and insulation (most commonly used) |
| XC | Continuity only |
| F | Insulation only |
| T | Leakage verification |
Step 5 – Start the Test
After configuring the test:
- Review all settings.
- Click Start.
- NETS creates and runs the SELFTEST.RO file automatically.
- Monitor the results for any reported failures.
Understanding the Results
After the Self-Test completes, review the results window for any reported failures.
Single Address Failure
A single address failure typically indicates an individual relay fault.
Possible causes:
- Failed relay
- Loose connection
- Damaged switching card
Recommended action:
Inspect the reported address and rerun the Self-Test to verify the failure.
Patterned Failures
Patterned failures usually indicate a larger hardware issue affecting multiple addresses.
Common causes include:
- Terminal selector faults
- Driver faults
If repeated patterned failures occur, further hardware diagnostics may be required.
When Should I Run a Self Test?
- Before troubleshooting a suspected hardware issue
- After replacing switching hardware
- As part of quarterly preventive maintenance
- Anytime abnormal switching behavior is observed